macOS Tahoe 26.x SSH 安全加固笔记
Contents
最近 Claude Bot 比较火,搞了个 Mac mini 来玩玩。下面是把 Mac mini 当作服务器的一些安全设置,主要是 SSH 方面的配置。
适用版本:macOS Tahoe / Sonoma / Ventura 及以后
架构特点:launchd Socket Activation(不再由 sshd 直接监听端口)
加固目标:
- 仅允许 SSH 公钥登录
- 禁用密码/交互认证
- 使用自定义端口,关闭默认 22
- 最小化网络暴露面
- 可验证、可回滚
一、背景说明(重要)
从 Ventura 开始,macOS 的 SSH 端口由 launchd 监听:
launchd先监听 22 端口- 有连接时才拉起
sshd进程 sshd_config中的Port配置项不会生效
因此:
❌ 仅修改
sshd_config的 Port → 无效
✅ 必须自建 LaunchDaemon 才能更改端口
二、客户端准备(MacBook)
1. 生成密钥(如已有可跳过)
ssh-keygen -t ed25519 -C "your-mbp"2. 拷贝公钥到服务器
ssh-copy-id user@mac-mini-ip3. 测试免密登录
ssh user@mac-mini-ip⚠️ 必须确认免密登录成功后再继续后续步骤!
三、服务器端配置(Mac mini)
Step 1:修正 SSH 密钥权限
chmod 700 ~/.ssh
chmod 600 ~/.ssh/authorized_keys
Step 2:配置 sshd_config
编辑配置文件:
sudo nano /private/etc/ssh/sshd_config推荐配置(可直接复制):
Port 22486

Protocol 2

PermitRootLogin no
#AllowUsers youruser

PasswordAuthentication no
KbdInteractiveAuthentication no
ChallengeResponseAuthentication no

PubkeyAuthentication yes
AuthenticationMethods publickey

AllowAgentForwarding no
AllowTcpForwarding no
X11Forwarding no

ClientAliveInterval 300
ClientAliveCountMax 2

MaxAuthTries 3
MaxSessions 2

LogLevel VERBOSE
💡 提示:如需限制登录用户,取消
AllowUsers注释并替换youruser为实际用户名。
Step 3:创建自定义 SSH LaunchDaemon(监听新端口)
创建 plist 文件:
sudo tee /Library/LaunchDaemons/com.openssh.sshd-custom.plist > /dev/null <<'PLIST'
<?xml version="1.0" encoding="UTF-8"?>
<!DOCTYPE plist PUBLIC "-//Apple//DTD PLIST 1.0//EN" "http://www.apple.com/DTDs/PropertyList-1.0.dtd">
<plist version="1.0">
  <dict>
    <key>Label</key>
    <string>com.openssh.sshd-custom</string>

    <key>ProgramArguments</key>
    <array>
      <string>/usr/sbin/sshd</string>
      <string>-i</string>
      <string>-f</string>
      <string>/private/etc/ssh/sshd_config</string>
    </array>

    <key>InetdCompatibility</key>
    <dict>
      <key>Wait</key>
      <false/>
    </dict>

    <key>Sockets</key>
    <dict>
      <key>Listeners</key>
      <dict>
        <key>SockServiceName</key>
        <string>22486</string>
        <key>SockFamily</key>
        <string>IPv4</string>
      </dict>

      <key>ListenersIPv6</key>
      <dict>
        <key>SockServiceName</key>
        <string>22486</string>
        <key>SockFamily</key>
        <string>IPv6</string>
      </dict>
    </dict>

    <key>RunAtLoad</key>
    <true/>
  </dict>
</plist>
PLIST
设置权限:
sudo chown root:wheel /Library/LaunchDaemons/com.openssh.sshd-custom.plist
sudo chmod 644 /Library/LaunchDaemons/com.openssh.sshd-custom.plist
加载服务:
sudo launchctl bootstrap system /Library/LaunchDaemons/com.openssh.sshd-custom.plist
sudo launchctl kickstart -k system/com.openssh.sshd-custom
Step 4:放行防火墙
命令行方式:
sudo /usr/libexec/ApplicationFirewall/socketfilterfw --add /usr/sbin/sshd
sudo /usr/libexec/ApplicationFirewall/socketfilterfw --unblockapp /usr/sbin/sshd
GUI 方式:
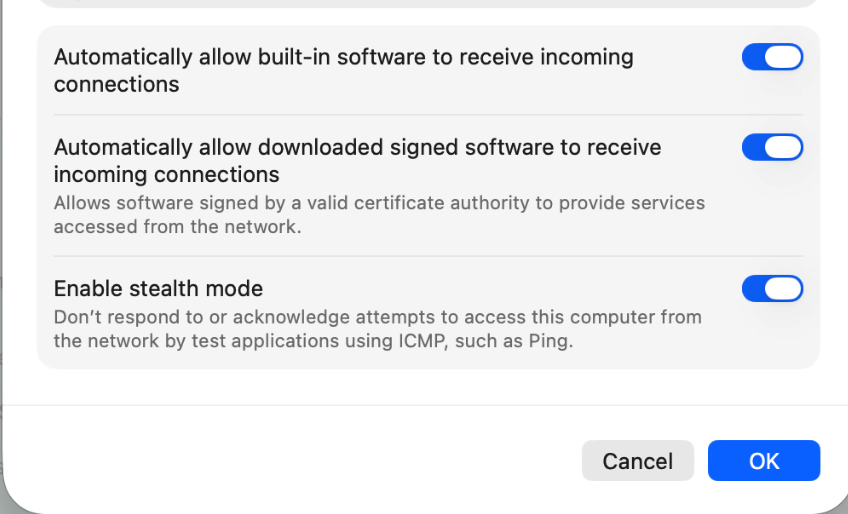
系统设置 → 网络 → 防火墙 → 打开 + 启用隐身模式
Step 5:测试新端口连接
⚠️ 必须先确认新端口可用,再关闭 22 端口!
在客户端执行:
ssh -p 22486 user@mac-mini-ip确认登录成功后,再进行下一步。
Step 6:关闭系统默认 SSH(关闭 22 端口)
GUI 方式(推荐):
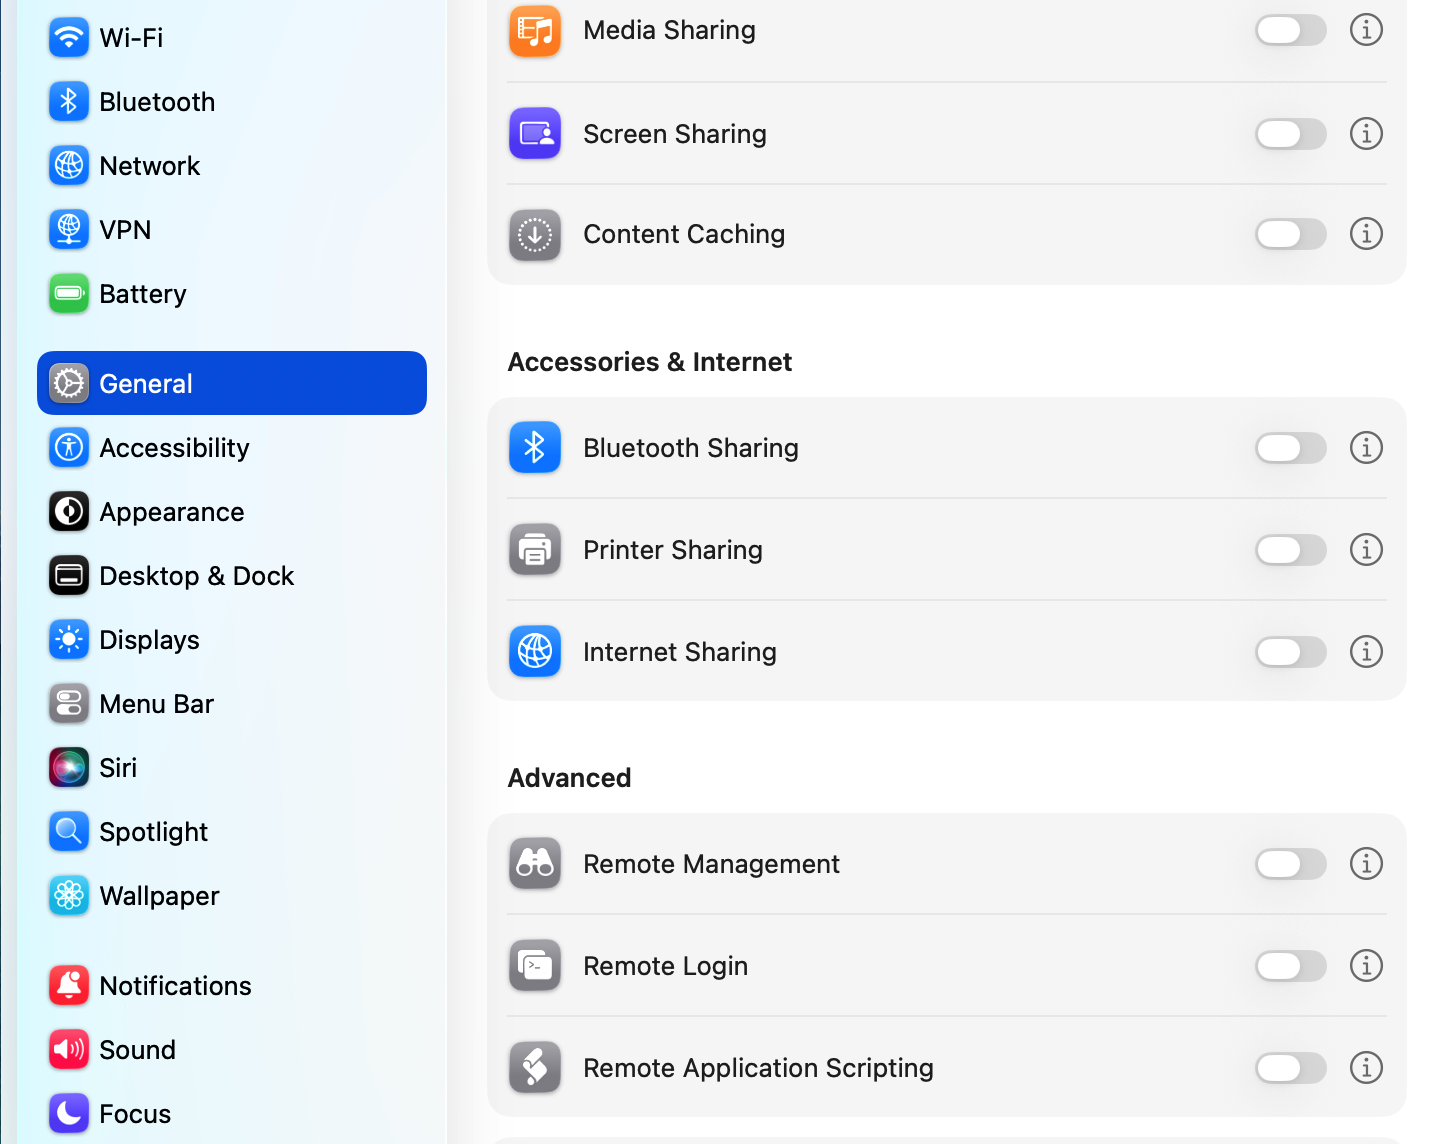
系统设置 → 通用 → 共享 → 远程登录 → 关闭
命令行方式:
sudo systemsetup -setremotelogin off四、验证清单(必须全部通过)
1. 检查端口监听状态(服务器端)
sudo lsof -nP -iTCP:22 -sTCP:LISTEN
sudo lsof -nP -iTCP:22486 -sTCP:LISTEN期望结果:
- 22 端口:无输出
- 22486 端口:
launchd正在监听
2. 登录测试(客户端)
ssh -p 22486 user@ip   # 应成功
ssh -p 22 user@ip      # 应失败
3. 验证密码登录已禁用
ssh -o PreferredAuthentications=password \
    -o PubkeyAuthentication=no \
-p 22486 user@ip期望结果:
Permission denied4. 查看最终生效配置
sudo sshd -T | grep -E "port|password|pubkey|allowusers|auth"5. 网络连通性测试
nc -vz ip 22486   # 应成功
nc -vz ip 22      # 应失败